When I was a kid, I used to play a Flash game on Neopets called: “IceCream Machine.” It’s a relatively simple game where you snake your way between columns of floating ice cream scoops that get progressively faster, but I always sucked at it because of my stupid kid motor skills (a lack thereof, rather).
A few years ago, I heard about Flash being deprecated and purged from all browsers, and I thought back to all the games I used to play on AddictingGames, CoolMathGames, Newgrounds, and several other sites that definitely (re-)hosted them with permission.
Then I thought about Neopets, and I couldn’t stop thinking about Neopets, so much so that I decided to make a new account and check out how it was going. Now, Ruffle was available at the time, so the Flash games were still playable (mostly, Ruffle is an emulator, after all). But, I noticed that they ported some of these older Flash games to the more modern HTML5.
I went and played some of them, and I was severely disappointed.
They were all full of bugs, mostly incomplete, and featured “upgrades” for mobile that couldn’t be turned off while playing on a desktop. And worse, my beloved childhood game has been reduced to a 10 FPS, bug-addled game that was clearly ported by someone who barely understood what they were doing and just threw it on the site so they could say it was there. It was one of the worst experiences I’ve had in a while.
I went through this journey in 2021 and told myself that it would absolutely get better in the future. It’s 2025 now, and nothing has changed. The games are in the same state they were back then, and it feels like Neopets won’t be putting any time into fixing these games soon. And I thought to myself: Surely it can’t be too hard to fix this mess of a game? And I was right, sorta.
To get to the bug fixing, I would have to get through multiple layers of… JavaScript Deobfuscation.
For those unfamiliar, JavaScript is an interpreted language, meaning throughout the pipeline of writing the code and then running it, it doesn’t get translated to code that is directly run by the CPU. Instead, the source code is read in and converted to bytecode and is then executed by an interpreter. This is a massive oversimplification (as JIT does exist). However, it demonstrates how you can get the entirety of the JavaScript source code of a website, except if they use obfuscation.
Obfuscation is the act of taking JavaScript source code and modifying it to hide (obfuscate) how it executes and to protect it from outside modification.
Now, I know some JavaScript — I wrote this whole website practically from scratch (thanks, Hugo) — but I’m more comfortable in the land of the compiled, so I wasn’t so sure I could get enough of the original JavaScript code from the obfuscated code to do any bug fixing.
But, I’m rather hard headed, so I got to work.
To begin with, I searched for enterprise-level JavaScript obfuscators. This was to get an understanding of what I’d have to do. The second solution I came across was JScrambler, which looks like this:
From: Jscrambler 101 Profiling
Y833.M3r=window;Y833.M90=o1MM(Y833.M3r);Y833.e5e=A9ii(Y833.M3r);Y833.R3kk=R3kk;Y833.U2O=u4DD(Y833.M3r);Y833.N0l=...;
It’s not exactly the same, but it almost matches, and I can catch a glimpse of a state machine in the exact same format that appears everywhere in our obfuscated JavaScript files.
This information isn’t super helpful, but it does give a small heads up about what I’m gonna be dealing with, like domain locking and anti-debugging.
- cone_class.js
- game_class.js
- gamecontrol.js
- graphics.js
- index.js
When looking through these files, some of them have some semblance of semi-unobfuscated code, and others look like they are entirely obfuscated. I’m gonna start with the easiest and smallest file, gamecontrol.js.
game_class[y2U.U0l(20)][y2U.S0l(9)]();
So game_class is an object — technically, it’s a function, but all functions are objects, so — and the code is trying to index into game_class with the result of y2U.S0l(20). y2U is a variable set further up the scope, var y2U = Y833;.
Let’s run this function and see what it gives!
")
game_class.instance.endGame()
You could execute y2U.U0l in a loop x amount of time, but that could cause me to miss a property or two, so I will continue to deobfuscate.
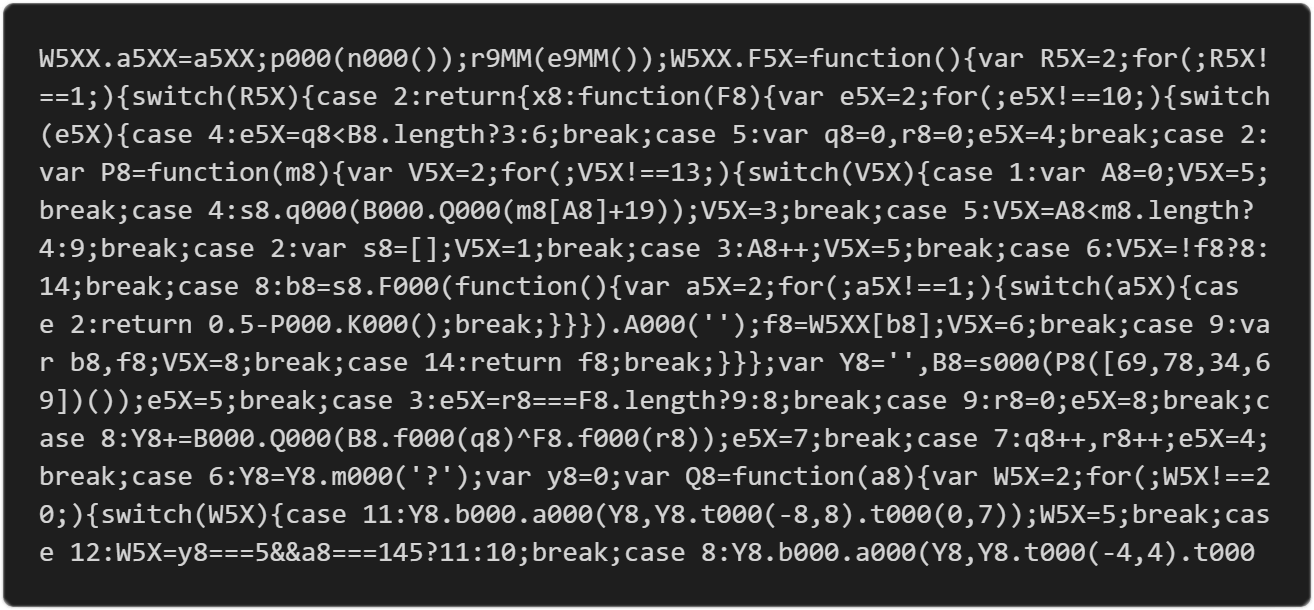
As it turns out, both Y833.S0l() and Y833.U0l() execute the same function, which traces back to a function in an object: Y833.N0l.W1O. This function is heavily obfuscated by using multiple nested state machines to obscure control flow.
function () {
var i1S = 2;
for (; i1S !== 1; ) {
switch (i1S) {
case 2:
return {
W1O: (
function (M1O) {
var W0l = 2;
for (; W0l !== 10; ) {
switch (W0l) {
case 4:
W0l = X1O < p1O.length ? 3 : 6;
break;
case 5:
var X1O = 0,
B1O = 0;
W0l = 4;
break;
case 7:
(X1O++, B1O++);
W0l = 4;
break;
case 11:
return l1O;
break;
case 9:
B1O = 0;
W0l = 8;
break;
case 2:
var J1O = function (e1O) {
var Q0l = 2;
for (; Q0l !== 13; ) {
switch (Q0l) {
case 5:
Q0l = F1O < e1O.length ? 4 : 9;
break;
case 4:
O1O.A4DD(K4DD.w4DD(e1O[F1O] + 54));
Q0l = 3;
break;
case 8:
r1O = O1O.v4DD(
function () {
var E0l = 2;
for (; E0l !== 1; ) {
switch (E0l) {
case 2:
return 0.5 - R4DD.y4DD();
break;
}
}
}
).q4DD('');
Q0l = 7;
break;
case 6:
Q0l = !u1O ? 8 : 14;
break;
case 1:
var F1O = 0;
Q0l = 5;
break;
case 9:
var r1O,
u1O;
Q0l = 8;
break;
case 7:
u1O = Y833[r1O];
Q0l = 6;
break;
case 14:
return u1O;
break;
case 3:
F1O++;
Q0l = 5;
break;
case 2:
var O1O = [];
Q0l = 1;
break;
}
}
};
var Q1O = '',
p1O = o4DD(J1O([53,
28,
53,
- 3]) ());
W0l = 5;
break;
case 3:
W0l = B1O === M1O.length ? 9 : 8;
break;
case 8:
Q1O += K4DD.w4DD(p1O.c4DD(X1O) ^ M1O.c4DD(B1O));
W0l = 7;
break;
case 6:
Q1O = Q1O.Z4DD('=');
var n1O = 0;
var l1O = function (m1O) {
var V0l = 2;
for (; V0l !== 16; ) {
switch (V0l) {
case 9:
V0l = n1O === 2 &&
m1O === 32 ? 8 : 7;
break;
case 14:
V0l = n1O === 4 &&
m1O === 38 ? 13 : 12;
break;
case 2:
V0l = n1O === 0 &&
m1O === 31 ? 1 : 4;
break;
case 20:
Q1O.f4DD.S4DD(Q1O, Q1O.D4DD( - 5, 5).D4DD(0, 3));
V0l = 5;
break;
case 6:
Q1O.f4DD.S4DD(Q1O, Q1O.D4DD( - 4, 4).D4DD(0, 3));
V0l = 5;
break;
case 8:
Q1O.f4DD.S4DD(Q1O, Q1O.D4DD( - 9, 9).D4DD(0, 8));
V0l = 5;
break;
case 19:
V0l = n1O === 7 &&
m1O === 19 ? 18 : 17;
break;
case 12:
V0l = n1O === 5 &&
m1O === 17 ? 11 : 10;
break;
case 17:
l1O = h1O;
V0l = 5;
break;
case 7:
V0l = n1O === 3 &&
m1O === 16 ? 6 : 14;
break;
case 4:
V0l = n1O === 1 &&
m1O === 9 ? 3 : 9;
break;
case 5:
return (n1O++, Q1O[m1O]);
break;
case 18:
Q1O.f4DD.S4DD(Q1O, Q1O.D4DD( - 6, 6).D4DD(0, 5));
V0l = 5;
break;
case 13:
Q1O.f4DD.S4DD(Q1O, Q1O.D4DD( - 6, 6).D4DD(0, 5));
V0l = 5;
break;
case 10:
V0l = n1O === 6 &&
m1O === 27 ? 20 : 19;
break;
case 11:
Q1O.f4DD.S4DD(Q1O, Q1O.D4DD( - 6, 6).D4DD(0, 5));
V0l = 5;
break;
case 1:
Q1O.f4DD.S4DD(Q1O, Q1O.D4DD( - 4, 4).D4DD(0, 3));
V0l = 5;
break;
case 3:
Q1O.f4DD.S4DD(Q1O, Q1O.D4DD( - 3, 3).D4DD(0, 2));
V0l = 5;
break;
}
}
};
var h1O = function (L2O) {
var D0l = 2;
for (; D0l !== 1; ) {
switch (D0l) {
case 2:
return Q1O[L2O];
break;
}
}
};
W0l = 11;
break;
}
}
}
) ('PMLUEC')
};
break;
}
}
}
  r1O = O1O.v4DD(
  function () {
    var E0l = 2;
    for (; E0l !== 1; ) {
      switch (E0l) {
        case 2:
          return 0.5 - R4DD.y4DD();
          break;
      }
    }
  }
).q4DD('');
The state machine in this example is entirely useless as it returns immediately; It’s equivalent to: return 0.5 - R4DD.y4DD();.
r1O = O1O.v4DD( function () { return 0.5 - R4DD.y4DD(); } ).q4DD('');
O1O is an array defined in a previous state, so let’s find out what these functions are.
![THE ACTUAL FUNCTION BEHIND [].v4DD](./function_obf.webp "The actual function behind [].v4DD")
Ah, I’m assuming this is another form of obfuscation employed by the obfuscation tooling; I’ll do this for the rest of them as they come up.
The cleaned-up function looks like this:
r1O = O1O.sort( function () { return 0.5 - Math.random(); } ).join('');
Not all state machines are this easy to flatten, so let’s get into a more difficult one!
Coincidentally, the last state machine I flattened was nested inside a more complex state machine, so let’s go with that one.
  var J1O = function (e1O) {
  var Q0l = 2;
  for (; Q0l !== 13; ) {
    switch (Q0l) {
      case 2:
        var O1O = [];
        Q0l = 1;
        break;
      case 1:
        var F1O = 0;
        Q0l = 5;
        break;
      case 5:
        Q0l = F1O < e1O.length ? 4 : 9;
        break;
      case 4:
        O1O.push(String.fromCharCode(e1O[F1O] + 54));
        Q0l = 3;
        break;
      case 3:
        F1O++;
        Q0l = 5;
        break;
      case 9:
        var r1O, u1O;
        Q0l = 8;
        break;
      case 8:
        r1O = O1O.sort( function () { return 0.5 - Math.random(); } ).join('');
        Q0l = 7;
        break;
      case 7:
        u1O = Y833[r1O];
        Q0l = 6;
        break;
      case 6:
        Q0l = !u1O ? 8 : 14;
        break;
      case 14:
        return u1O;
        break;
    }
  }
};
Reading states 1 through 3 of this state machine, it looks like it initializes F1O, goes to state 5, and checks if F1O is less than the length of the function argument e1O, branches to 4 if it is, and branches to 9 if not. In state 4, it pushes a decoded char into the O1O array, branches to 3, where it increments F1O by one, and then heads back to state 5.
  case 1:
  // <i-loop> init
  var F1O = 0;
  Q0l = 5;
  break;
case 5:
  // <i-loop> branch
  Q0l = F1O < e1O.length ? 4 : 9;
  break;
case 4:
  // <i-loop> body
  O1O.push(String.fromCharCode(e1O[F1O] + 54));
  Q0l = 3;
  break;
case 3:
  // <i-loop> increment
  F1O++;
  Q0l = 5;
  break;
Nice, now let’s do the rest of the state machine.
It seems like states 9 to 14 create a do-while loop. Let’s annotate that too::
  case 9:
  // <w-loop> declaration
  var r1O, u1O;
  Q0l = 8;
  break;
case 8:
  // <w-loop> body 1
  r1O = O1O.sort( function () { return 0.5 - Math.random(); } ).join('');
  Q0l = 7;
  break;
case 7:
  // <w-loop> body 2
  u1O = Y833[r1O];
  Q0l = 6;
  break;
case 6:
  // <w-loop> branch
  Q0l = !u1O ? 8 : 14;
  break;
case 14:
  return u1O;
  break;
Alright, now let’s flatten this state machine and keep the annotations:
  // state 2
var O1O = [];

// <i-loop> 1, 5, 3
for (var F1O = 0; F1O < e1O.length; F1O++) {
  // state 4
  O1O.push(String.fromCharCode(e1O[F1O] + 54));
}

// <w-loop> 9
var r1O, u1O;

do {
  // <w-loop> 8
  r1O = O1O.sort( function () { return 0.5 - Math.random(); } ).join('');
  // <w-loop> 7
  u1O = Y833[r1O];
// <w-loop> 6
} while(!u1O);

// state 14
return u1O;
I’m sure this could be refactored to be even smaller, but this is relatively understandable.
The function decodes 4 encoded characters in an array and then pushes them into a new array. It then randomizes this array, joins them together, and uses bracket notation to find a property with that name and returns the property! This code seems really inefficient because you could get lost in a near-infinite loop, but it only runs once, so I guess it’s not too bad.
The property it returns, R3kk, is actually a function that returns a string that looks to be encoded. Once I flatten this whole state machine, we’ll see how it decodes this string.
There is another state machine nested within this overarching state machine, but it’s a pretty simple else-if chain, so I’ll skip over that and get to the flattening of this main state machine.
Now that we have a relatively flat state machine, let’s flatten it one more time.
Click to reveal nearly flattened state machine
  W1O: (
  function (M1O) {
    var W0l = 2;
    for (; W0l !== 10; ) {
      switch (W0l) {
        case 2:
          var J1O = function (e1O) {
            var O1O = [];

            for (var F1O = 0; F1O < e1O.length; F1O++) {
              O1O.push(String.fromCharCode(e1O[F1O] + 54));
            }

            var r1O, u1O;
            do {
              r1O = O1O.sort( function () { return 0.5 - Math.random(); } ).join('');
              u1O = Y833[r1O];
            } while(!u1O);

            return u1O;
          };
          var Q1O = '', p1O = o4DD(J1O([53, 28, 53, - 3]) ());
          W0l = 5;
          break;
        case 5:
          var X1O = 0, B1O = 0;
          W0l = 4;
          break;
        case 4:
          W0l = X1O < p1O.length ? 3 : 6;
          break;
        case 3:
          W0l = B1O === M1O.length ? 9 : 8;
          break;
        case 9:
          B1O = 0;
          W0l = 8;
          break;
        case 8:
          Q1O += String.fromCharCode(p1O.charCodeAt(X1O) ^ M1O.charCodeAt(B1O));
          W0l = 7;
          break;
        case 7:
          (X1O++, B1O++);
          W0l = 4;
          break;
        case 6:
          Q1O = Q1O.Z4DD('=');
          var n1O = 0;
          var l1O = function (m1O) {
            if (n1O === 0 && m1O === 31) {
              Q1O.unshift.apply(Q1O, Q1O.splice(-4, 4).splice(0, 3));
            } else if (n1O === 1 && m1O === 9) {
              Q1O.unshift.apply(Q1O, Q1O.splice(-3, 3).splice(0, 2));
            } else if (n1O === 2 && m1O === 32) {
              Q1O.unshift.apply(Q1O, Q1O.splice(-9, 9).splice(0, 8));
            } else if (n1O === 3 && m1O === 16) {
              Q1O.unshift.apply(Q1O, Q1O.splice(-4, 4).splice(0, 3));
            } else if (n1O === 4 && m1O === 38) {
              Q1O.unshift.apply(Q1O, Q1O.splice(-6, 6).splice(0, 5));
            } else if (n1O === 5 && m1O === 17) {
              Q1O.unshift.apply(Q1O, Q1O.splice(-6, 6).splice(0, 5));
            } else if (n1O === 6 && m1O === 27) {
              Q1O.unshift.apply(Q1O, Q1O.splice(-5, 5).splice(0, 3));
            } else if (n1O === 7 && m1O === 19) {
              Q1O.unshift.apply(Q1O, Q1O.splice(-6, 6).splice(0, 5));
            } else {
              l1O = h1O;
            }

            return (n1O++, Q1O[m1O]);
          };

          var h1O = function (L2O) {
            return Q1O[L2O];
          };
          W0l = 11;
          break;
        case 11:
          return l1O;
          break;
      }
    }
  }
) ('PMLUEC')
Looking over the state machine, it seems that states 5 through 7 are a loop that decodes the encoded string returned by R3kk.
  W1O: (function (key) {
    var get_encoded_ciphered_properties_function = function (coded_chars) {
        var function_chars = [];

        for (var i = 0; i < coded_chars.length; i++) {
            function_chars.push(String.fromCharCode(coded_chars[i] + 54));
        }

        var potention_property_name, potention_property;
        do {
            potention_property_name = function_chars.sort( function () { return 0.5 - Math.random(); } ).join('');
            potention_property = Y833[potention_property_name];
        } while(!potention_property);

        return potention_property;
    };
                      // cipher_text = decodeURI(R3kk());
    var properties = '', cipher_text = decodeURI(get_encoded_ciphered_properties_function([53, 28, 53, - 3])());

    for (var ci = 0, ki = 0; ci < cipher_text.length; ci++, ki++){
        if (ki === key.length) { ki = 0; }

        properties += String.fromCharCode(cipher_text.charCodeAt(ci) ^ key.charCodeAt(ki));
    }

    properties = properties.split('=');

    var i = 0;
    var retrieve_property = function (property_index) {
        if (i === 0 && index === 31) {
            properties.unshift.apply(properties, properties.splice(-4, 4).splice(0, 3));
        } else if (i === 1 && property_index === 9) {
            properties.unshift.apply(properties, properties.splice(-3, 3).splice(0, 2));
        } else if (i === 2 && property_index === 32) {
            properties.unshift.apply(properties, properties.splice(-9, 9).splice(0, 8));
        } else if (i === 3 && property_index === 16) {
            properties.unshift.apply(properties, properties.splice(-4, 4).splice(0, 3));
        } else if (i === 4 && property_index === 38) {
            properties.unshift.apply(properties, properties.splice(-6, 6).splice(0, 5));
        } else if (i === 5 && property_index === 17) {
            properties.unshift.apply(properties, properties.splice(-6, 6).splice(0, 5));
        } else if (i === 6 && property_index === 27) {
            properties.unshift.apply(properties, properties.splice(-5, 5).splice(0, 3));
        } else if (i === 7 && property_index === 19) {
            properties.unshift.apply(properties, properties.splice(-6, 6).splice(0, 5));
        } else {
            retrieve_property = expended_shift_retrieve_property;
        }

        return (i++, properties[property_index]);
    };

    var expended_shift_retrieve_property = function (index) {
        return properties[index];
    };

    return retrieve_property;
}) ('PMLUEC')
Since we now have a human-readable function, let’s figure out what it does.
First, it calls a function that returns some URI-encoded cipher text. It then takes that cipher text and decodes it with the key PMLUEC using a repeating-key XOR decryption scheme. Next, it takes the plain text string and splits it along a delimiter to get all of the properties into a list.
The end of this function is pretty interesting. If you were to start replacing all the Y833.S0l() function calls with the element in the argument, all the replacements would be wrong. The function initially defined in retrieve_property shifts and removes some entries based on the index passed into W1O, and a value gets incremented every function call. If the function is not called with the indexes 31, 9, 32, 16, 38, 17, 27, and 19 sequentially, the function will fail to reposition all properties correctly.
When I first saw this, I thought I would have to track down where the function was called the first x number of times to get the value it returns so I could replace the function call with the actual property. Thankfully, a little further down the file, another obfuscated function calls Y833.S0l() with the proper sequence.
To streamline the process of decoding the properties, I wrote a function that allows me to automatically decode, find the delimiter, split it along the delimiter into an array, and finally unshift the array to retrieve the properties list:
  function retrieve_shifted_properties_list(cypher_text, key, shift_rules) {
    cypher_text = decodeURI(cypher_text);

    plain_text = '';

    for (var ci = 0, ki = 0; ci < cypher_text.length; ci++, ki++) {
        if (ki === key.length) {
            ki = 0;
        }

        plain_text += String.fromCharCode(cypher_text.charCodeAt(ci) ^ key.charCodeAt(ki));
    }

    function get_delimiter(str) {
        var chars = {};

        // Count all non-alphanumeric characters (I believe delimiters are always non-alphanumeric)
        for (const c of str) {
            var code = c.charCodeAt(0);

            if (!(code > 47 && code < 58) && // numeric (0-9)
                !(code > 64 && code < 91) && // upper alpha (A-Z)
                !(code > 96 && code < 123)) { // lower alpha (a-z)
                    if (chars[c]) {
                        chars[c]++;
                    } else {
                        chars[c] = 1;
                    }
                }
        }

        var largest = 0;
        var most_occurrent_char = 'e';

        // Find most occurrent character
        for (const [k, v] of Object.entries(chars)) {
            if (largest == 0) {
                largest = v;
                most_occurrent_char = k;
            } else {
                if (largest < v) {
                    largest = v;
                    most_occurrent_char = k;
                }
            }
        }

        return most_occurrent_char;
    }

    properties = plain_text.split(get_delimiter(plain_text));

    // Property shifter
    // ex: [[[-8, 8], [0, 7]], [[-5, 5], [0, 3]], [[-5, 5], [0, 3]], [[-4, 4], [0, 2]], [[-10, 10], [0, 8]], [[-6, 6], [0, 4]], [[-8, 8], [0, 7]]]
    if (shift_rules) {
        for (const shift_rule of shift_rules) {
            properties.unshift.apply(properties, properties.splice(shift_rule[0][0], shift_rule[0][1]).splice(shift_rule[1][0], shift_rule[1][1]));
        }
    }

    return properties;
}
retrieve_shifted_properties_list(R3kk(), 'PMLUEC', [[[-4, 4], [0, 3]], [[-3, 3], [0, 2]], [[-9, 9], [0, 8]], [[-4, 4], [0, 3]], [[-6, 6], [0, 5]], [[-6, 6], [0, 5]], [[-5, 5], [0, 3]], [[-6, 6], [0, 5]]]);
The first two arguments are simple, it’s the cipher text returning function and the key, PMLUEC. But the last argument is the sequence of unshifts in the retrieve_property function: ... properties.splice(-4, 4).splice(0, 3) ....
Y833.S0l() function calls with the corresponding property.
  import re
from typing import List
"""
file: path to file
regex: raw literal regex pattern with one group
replacements: list of things
replacement_string: formatable string
"""
def mass_indexed_replace(file: str, regex: str, replacements: List[str], replacement_string = "\"{0}\""):
    with open(file, "r") as big_file:
        regex_match = re.compile(regex)

        readin = big_file.readlines()
        result = []
        for elem in readin:
            line = elem
            for match in regex_match.finditer(elem):
                line = line.replace(match.group(0), replacement_string.format(replacements[int(match.group(1))]))
            result.append(line)
            with open(file[:file.rindex('.')] + ".reduced" + file[file.rindex('.'):], "w") as sub_file:
                sub_file.write("".join(result))
Example:
mass_indexed_replace("gamecontrol.js", r"Y833\.[US]0l\((\d+?)\)", ["gGame", "mousedown", "getTime", "addChild", "Sound", "buthelp", "mouseChildren", ...])
  var M2U = [arguments];

M2U[6] = -1627974560;
M2U[2] = -999255069;
M2U[5] = 1400892870;
if (
  !(
    y2U.k9X(0, !1, 211226) !== M2U[6] &&
    y2U.O9X(0, !1, 577795) !== M2U[2] &&
    y2U.k9X(0, !!0, 663643) !== M2U[5] &&
    !Y833.w7a()
  )
)
The function being called is almost entirely unobfuscated, and it looks to be a hashing function. Instead of trying to understand that, I replaced the array indexes with the data they reference and pasted it into the Firefox JavaScript input interpreter; every single time I did this, it returned true, and I removed them.
When deobfuscating a whole file, I found a function that was sprinkled in a few places that checked the domain where the JavaScript file was being executed. I decided that instead of figuring out what it was doing, I would remove every reference to the function, as it was a fair bit easier than trying to defuse it. Then again, with FireFox’s script override feature, I didn’t really need to stop the script from doing any domain checking.
Completely obfuscated files like game_class.js and graphics.js have all of their code encoded. Worse yet, none of my previous dynamic analysis techniques work, as I believe the function is self-verifying, meaning I can’t modify it at all without stripping out the verification method.
This would seem to be a dead end, but the obfuscation tooling didn’t do enough to obfuscate its own execution.
To encode the javascript code, it needs to be in text form, and the only way text can be executed in javascript is with the eval function. So, we should look for an eval function in the file. And using FireFox’s JavaScript debugger, I can stop execution just before it retrieves the plaintext code.

There’s the actual code for the game_class function. Copy it down and replace the entire var game_class assignment with it, and continue with deobfuscation as we did above will reveal the entirety of the code.
Now that all of the code is deobfuscated — sorta, some of the original ActionScript code was originally obfuscated when they initially ported it to JavaScript, and I won’t be deobfuscating this as it’s not super important — we can start bug fixing!
For some reason, after level 10, the names of the scoop flavors don’t show up. This is an easy fix because the level names were just never included.
This bug displays itself like this:

  createjs.IDS_level_9 = "Vanilla Chocolate Swirl";
createjs.IDS_level_10 = "Double Chocolate"; // More flavor names should come immediately after this
createjs.IDS_game_over = "GAME OVER";
createjs.IDS_congrats = "CONGRATULATIONS!";
  createjs.IDS_level_9 = "Vanilla Chocolate Swirl";
createjs.IDS_level_10 = "Double Chocolate";
createjs.IDS_level_11 = "Tigersquash";
createjs.IDS_level_12 = "Rainbowberry";
createjs.IDS_level_13 = "Garlicky Bratwurst";
createjs.IDS_game_over = "GAME OVER";
createjs.IDS_congrats = "CONGRATULATIONS!";
And…
Success!!!
On the ending screens, the Send Score button won’t highlight or return to normal on hover and unhover.

taskoneButtonsHandler in gamecontrol.js and looked at the mouseover and mouseout button events. I didn’t see anything that looked like the name of the send score button:
if (this.name == "buthelp" || this.name == "butplay" || this.name == "butsound" || this.name == "butback" || this.name == "restart")
So, I went into the graphics.js file to find its name.
  this.frame_0 = function() {
  this.stop();
  addButtonEvents([this.restart, "restart"]);
  addButtonEvents([this.sendscore, "sendscore"]);
};
Here, we can see the reset and send score buttons attach themselves to the button event handler function.
mouseover and mouseout button events.
if (this.name == "buthelp" || this.name == "butplay" || this.name == "butsound" || this.name == "butback" || this.name == "restart" || this.name == "sendscore")
After adding it, both hovering and unhovering work as expected!

Sometimes, when going to the next level, the screen’s splash will not be set to the proper flavor:

The splash should be Vanilla, but it’s actually Strawberry.
This happens because the splash graphic automatically resets after being added to a parent object, and a Neopets developer attempted to fix this by writing this code:
  setTimeout(function() {
    Z56[2].splash.gotoAndStop(Z56[3] - 1);
    Z56[2].tfield1.text = createjs.levelHead;
    Z56[2].tfield1_1.text = createjs.levelText;
    Z56[2].tfield2.text = "NUMBER OF SCOOPS:";

    Z56[2].tfield2_1.text = createjs.goalText;
    Z56[2].tfield3.text = "PRESS SPACE TO CONTINUE...";
}, 10);
For a reason I don’t entirely understand, the graphics resetting itself is a feature of the framework this game uses to translate ActionScript/Flash API to HTML5, createjs.
A more full solution to this issue would be to prevent the object from resetting itself.
The Createjs framework has a built-in property — autoReset — that prevents an object’s graphics from being reset when parenting it to an object.
  Z56[2].splash.autoReset = false;
Z56[2].splash.gotoAndStop(Z56[3] - 1);
Z56[2].tfield1.text = createjs.levelHead;
Z56[2].tfield1_1.text = createjs.levelText;
Z56[2].tfield2.text = "NUMBER OF SCOOPS:";

Z56[2].tfield2_1.text = createjs.goalText;
Z56[2].tfield3.text = "PRESS SPACE TO CONTINUE...";
And you consistently get:

When you do actually finish the game, the win screen doesn’t show up:

st_gamebeat. Instead of setting the game class instance’s state, the code sets this.game_state.
  case game_class.instance.st_countdown1:
  if (!game_class.instance.zz()) {
    this.game_state = game_class.instance.st_gamebeat;
  } else {...}
The fix is:
  case game_class.instance.st_countdown1:
  if (!game_class.instance.zz()) {
    game_class.instance.game_state = game_class.instance.st_gamebeat;
  } else {...}
Now the win screen shows up, but there’s another issue:

This is just the game over screen. Why is it not congratulating me on my win? Well, after tapping it out, the game over and win screen use the same function to display a screen on the ending state. However, the function only has code for the game over screen, so let’s rewrite it to add the congratulations text.
Adding this is pretty simple, so I won’t show the code.

Ah, now the background refuses to be set to the Garlicky Bratwurst splash screen. Initially, I thought it was the same issue that the level screen had, but when I tried to turn off the autoReset property, nothing happened.
I had to go searching through the graphics code to fix this.
Thankfully, the code in the game over function constructs the graphics object:
createjs.mcGameOver = new lib.mcGameOver();
So, searching through that graphics class, I found a property called splash.
this.splash.cache(-2, -2, 734, 594);
This stood out to me instantly. Reading through the Createjs documentation for the cache function it says:
“Draws the display object into a new element, which is then used for subsequent draws”
That’s why it’s not changing! Removing this one line fixes it completely:

Now that I fixed all the bugs I could find, let’s improve some things.
This is a small and pedantic change, but I’d like the name for this to be more accurate.
Does this really look like Vanilla Topping?

createjs.IDS_topping_3 = "Vanilla Topping";
createjs.IDS_topping_3 = "Caramel Topping";
mainLoopInterval = setInterval(game_class.instance.mainLoop, 100);
Looking at the setInterval documentation on MDN, the second argument is the delay between each function execution in milliseconds.
To set the framerate, typically, you’d write something like this: 1 second / FPS. Since setInterval is timed with milliseconds, you need to use 1000 / FPS.
The only way to get 100 from 1000 / FPS is 1000 / 10, meaning the game runs at 10 FPS!
The easy fix for this is to replace 100 with 1000 / 30 to get 30 FPS.
I would replace the setInterval function with the requestAnimationFrame function. The reason for this change is to match the game’s framerate to the browser’s refresh rate. This change could be a bit tedious, so I leave it for a later date. (This is expanded on in the addendum section)
This is one of the most complex sections of all of the improvements. Thankfully, I didn’t have to code my own tooling, but it was still a pain to get working.
My reason for adding a settings menu was to make sure the user experience was customizable. If a person wanted to have the character float above the mouse — something they may have grown accustomed to — or directly underneath it, they should have that choice.
I started by making a mockup of the settings menu in Inkscape:

It certainly doesn’t look perfect, but it gets the job done.
settings_menu that extends the Createjs class MovieClip and then added it to the main menu class.
  class settings_menu extends MovieBase {
  ...
}

(f8s[8].intro = function(p31, D31, j31) {
  ...
  this.settings_menu = new settings_menu();
  this.settings_menu.parent = this;
  ...
}
Next, I replaced the music toggle button on the main menu screen. First, though, I need to make the settings button.
To create the settings button, I copied the definition for the music toggle button class, changed the text, and then replaced the music button in the main menu. Resulting in this:

taskoneButtonsHandler, I added a section in the pressup for the settings button that makes the settings menu visible:
  if (this.name == "butsettings") {
  contmc.content_mc.intro_mc.settings_menu.visible = true;
}
After creating the base for the settings menu, I started by making the background. And I immediately ran into a problem, Createjs doesn’t use SVG commands; it has its own way of constructing shapes.
Createjs allows developers to construct graphics by calling drawing functions via the fluent interface design pattern. Notably, you can also encode a path to a base64 string, but there is no prebuilt SVG path encoder, so I had to go with something else.
Thankfully, somebody created an SVG path to Createjs path elf-deployable web app that converts SVG paths to Createjs drawing functions. The last commit to the repo was 8 years ago, but despite its age, it still worked! Probably because the Neopets site uses a Createjs version from 2015 (this is actually a function of the Adobe Animate version they used).
It only does paths, so I’ll have to translate the text and regular shapes by hand.
  class imp_checkbox extends MovieBase {
  constructor(Z31, u31, b31) {
    // super(new createjs.Rectangle(0, 0, 22, 22), null);
    super(null, null);
    this.initialize(Z31, u31, b31, {});

    this.frame_0 = function() { this.stop(); }
    this.timeline.addTween(createjs.Tween.get(this).call(this.frame_0).wait(1));

    // Checkbox
    this.checkbox = new createjs.Shape();
    this.checkbox.graphics.setStrokeStyle(2).beginStroke("#ffffff").moveTo(4.34646, 0.94488001).lineTo(17, 0.94488001).bezierCurveTo(18.884, 0.945, 20.402, 2.462, 20.402, 4.346).lineTo(20.402, 17).bezierCurveTo(20.402, 18.884, 18.885, 20.402, 17, 20.402).lineTo(4.34646, 20.402).bezierCurveTo(2.462, 20.402, 0.945, 18.885, 0.945, 17).lineTo(0.945, 4.34645).bezierCurveTo(0.945, 2.462, 2.462, 0.945, 4.347, 0.945).endStroke();

    this.checkbox.parent = this;

    // Toggled "X"
    this.check = new createjs.Text("X", "28px 'Mufferaw Rg'", "#ff0000");
    this.check.parent = this;
    this.check.align = "center";
    var check_bounds = this.check.getBounds();
    this.check.setTransform(11, 11, 1, 1, 0, 0, 0, check_bounds.width / 2, check_bounds.height / 2);

    // Hover "X"
    this.check_hover = new createjs.Text("X", "28px 'Mufferaw Rg'", "#ffff00");
    this.check_hover.parent = this;
    this.check_hover.align = "center";
    var check_bounds = this.check_hover.getBounds();
    this.check_hover.setTransform(11, 11, 1, 1, 0, 0, 0, check_bounds.width / 2, check_bounds.height / 2);

    this.timeline.addTween(createjs.Tween.get({}).to({ state: [ { t: this.checkbox } ]}).wait(1).to({ state: [ { t: this.check_hover }, {t: this.checkbox }] }).wait(1).to({ state: [ { t: this.check }, {t: this.checkbox }] }).wait(1));
  }
}
This checkbox was then followed up with a ToggleButton class that implements all the logic for the button, adds a text label, and a bounding box:
  class ToggleButton extends MovieBase {
  constructor(label_text, font, color, x, y, padding, Z31, u31, b31) {
    super(new createjs.Rectangle(0, 0, 505, 544.1), null);
    this.initialize(Z31, u31, b31, {});

    this.toggled = false;
    this.padding = padding;
    this.frame_0 = function() { this.stop(); };
    this.timeline.addTween(createjs.Tween.get(this).call(this.frame_0).wait(1));

    this.toggle_box = new imp_checkbox();
    this.toggle_box.autoReset = false;
    this.toggle_box.setTransform(0, 0);
    this.timeline.addTween(createjs.Tween.get(this.toggle_box).wait(1));

    this.label = new createjs.Text(label_text, font, color,);
    this.label.setTransform(30, 0);
    this.timeline.addTween(createjs.Tween.get(this.label).wait(1));

    this.bounding_box = create_bounding_box(x, this.toggle_box, this.label, padding);
    this.timeline.addTween(createjs.Tween.get(this.bounding_box).wait(1));
    this.setTransform(x, y);
  }

  left_no_bb() {
    let bounds = this.getBounds();
    return {x: (this.x + this.padding) + (bounds.width - (this.padding * 2)), y: this.y }
  }

  set_state(toggled) {
    this.toggled = toggled;
    this.toggle_box.gotoAndStop((toggled) ? 2 : 0);
  }

  toggle() {
    if (this.toggled) {
      this.toggled = false;
      this.toggle_box.gotoAndStop(0);
    } else {
      this.toggled = true;
      this.toggle_box.gotoAndStop(2);
    }
  }
}
This ToggleButton needs to have a bounding box; if it doesn’t have one, the button only works if you hover on the defined shapes. There’s a problem, though: the bounding box is a rectangle that would cover everything; to prevent that, I set its transparency to 0.01. If you set it to zero, Createjs will disable the bounding box.
There’s also supporting logic that allows a developer to toggle the button and set its state.
The function left_no_bb is used when positioning the checkbox as the bounding box offsets the top-left position.
Now that the single reusable thing has been implemented, I can get on to the rest of the layout.
The settings box background was easy to translate to Createjs, but the transparent background gave me some trouble in the SVG path tool. Breaking it down into 4 individual paths made it work, though.
To make things easier for myself, I collected related objects into containers for them to be positioned more easily.
I’m not going to go into much more detail, as the code can speak for itself:
  class settings_menu extends MovieBase {
  constructor(Z31, u31, b31) {
    super(new createjs.Rectangle(0, 0, 505, 544.1), null);
    this.initialize(Z31, u31, b31, {});
    this.frame_0 = function() { this.stop(); };
    this.timeline.addTween(createjs.Tween.get(this).call(this.frame_0).wait(1));

    var text_color = "#ffffff";

    this.settings_label = new createjs.Text("settings", "32px 'Mufferaw Rg'", text_color);
    this.settings_label.parent = this;
    this.settings_label.setTransform(56, 193);
    this.timeline.addTween(createjs.Tween.get(this.settings_label).wait(1));

    class SoundToggle extends createjs.Container {
      constructor(x, y) {
        super();
        this.sound_label = new createjs.Text("sound:", "24px 'Mufferaw Rg'", text_color);
        this.sound_label.setTransform(0, 3);

        this.sound_on_toggle = new ToggleButton("on", "24px 'Mufferaw Rg'", text_color, 95, 3, 3);
        this.sound_off_toggle = new ToggleButton("off", "24px 'Mufferaw Rg'", text_color, this.sound_on_toggle.left_no_bb().x + 40, 3, 3);
        this.addChild(this.sound_label, this.sound_on_toggle, this.sound_off_toggle);

        this.setTransform(x, y);
      }
    }

    this.sound_toggle = new SoundToggle(64, 228);
    this.sound_toggle.parent = this;
    this.timeline.addTween(createjs.Tween.get(this.sound_toggle).wait(1));

    class FPSToggle extends createjs.Container {
      constructor(x, y) {
        super();
        this.fps_label = new createjs.Text("fps:", "24px 'Mufferaw Rg'", text_color);
        this.fps_label.setTransform(0, 3);

        this.fps_10_toggle = new ToggleButton("10", "24px 'Mufferaw Rg'", text_color, 95, 3, 3);
        this.fps_30_toggle = new ToggleButton("30", "24px 'Mufferaw Rg'", text_color, 164 - 3, 3, 3);
        this.addChild(this.fps_label, this.fps_10_toggle, this.fps_30_toggle);

        this.setTransform(x, y);
      }
    }

    this.fps_toggle = new FPSToggle(64, 258);
    this.fps_toggle.parent = this;
    this.timeline.addTween(createjs.Tween.get(this.fps_toggle).wait(1));

    class HoverSelection extends createjs.Container {
      constructor(x, y) {
        super();
        this.hover_label = new createjs.Text("adee hover distance:", "28px 'Mufferaw Rg'", text_color);
        this.hover_label.setTransform(5, 0);

        this.device_toggle = new ToggleButton("device", "24px 'Mufferaw Rg'", text_color, 0, 33, 3);
        this.mobile_toggle = new ToggleButton("mobile", "24px 'Mufferaw Rg'", text_color, 140 - 3 * 2, 33, 3);
        this.desktop_toggle = new ToggleButton("desktop", "24px 'Mufferaw Rg'", text_color, 262 - 3 * 2, 33, 3);
        this.addChild(this.hover_label, this.device_toggle, this.mobile_toggle, this.desktop_toggle);

        this.setTransform(x, y);
      }
    }

    this.hover_selection = new HoverSelection(55, 294);
    this.hover_selection.parent = this;
    this.timeline.addTween(createjs.Tween.get(this.hover_selection).wait(1));

    class ExitButton extends MovieBase {
      constructor(Z31, u31, b31) {
        super(null, null);
        this.initialize(Z31, u31, b31, {});
        this.frame_0 = function() { this.stop(); }
        this.timeline.addTween(createjs.Tween.get(this).call(this.frame_0).wait(1));

        this.exit_static = new createjs.Text("exit", "40px 'Mufferaw Rg'", "#ffffff");
        this.exit_static.parent = this;
        this.exit_static.align = "center";

        this.exit_hover = new createjs.Text("exit", "40px 'Mufferaw Rg'", "#ffff00");
        this.exit_hover.parent = this;
        this.exit_hover.align = "center";

        this.exit_clicked = new createjs.Text("exit", "40px 'Mufferaw Rg'", "#ff0000");
        this.exit_clicked.parent = this;
        this.exit_clicked.align = "center";

        var exit_bounds = this.exit_static.getBounds();
        this.rect = new createjs.Shape();
        this.rect.graphics.beginFill("#ffffff").drawRect(exit_bounds.x - 2.5, exit_bounds.y - 2.5, exit_bounds.width + 5, exit_bounds.height + 5);
        this.rect.parent = this;
        this.rect.alpha = .01;

        this.timeline.addTween(createjs.Tween.get({}).to({ state: [ { t: this.rect }, { t: this.exit_static } ]}).wait(1).to({ state: [ { t: this.rect }, { t: this.exit_hover } ]}).wait(1).to({ state: [ { t: this.exit_clicked } ]}).wait(1));
      }
    }

    // Exit button
    this.exit_button = new ExitButton();
    this.exit_button.parent = this;
    this.exit_button.setTransform(214, 358);
    this.timeline.addTween(createjs.Tween.get(this.exit_button).wait(1));

    this.bkg = new createjs.Shape();
    this.bkg.parent = this;
    this.bkg.graphics.beginFill("#000000").moveTo(51.961859, 179.97162).lineTo(448.03815, 179.97162).bezierCurveTo(453.813, 179.972, 458.461, 184.802, 458.461, 190.803).lineTo(458.461, 386).bezierCurveTo(458.461, 392, 453.812, 396.831, 448.038, 396.831).lineTo(51.961859, 396.831).bezierCurveTo(46.187, 396.831, 41.539, 392, 41.539, 386).lineTo(41.539, 190.80259).bezierCurveTo(41.539, 184.802, 46.188, 179.972, 51.962, 179.972).endFill();
    this.bkg.alpha = 0.85;
    this.timeline.addTween(createjs.Tween.get(this.bkg).wait(1));

    // Clicking on the background exits the settings menu
    this.bkg_exit = new createjs.Shape();
    this.bkg_exit.parent = this;
    this.bkg_exit.graphics.beginFill("black").moveTo(41.5388, 0).lineTo(458.461, 0).lineTo(458.461, 191).bezierCurveTo(458, 191, 458, 180.739, 447.577, 180.032).lineTo(51.9619, 180.032).bezierCurveTo(41.532, 180.872, 41.539, 190.863, 41.539, 190.863).moveTo(41.538796, 385.76003).bezierCurveTo(41.539, 385.76, 41.466, 395.773, 51.962, 396.591).lineTo(448.03815, 396.591).bezierCurveTo(458.159, 396.016, 458.461, 385.76, 458.461, 385.76).lineTo(458.45989, 540).lineTo(41.538796, 540).drawRect(0, 0, 41.539, 538.613).drawRect(458.461, 0, 41.539, 538.613).endFill();
    this.bkg_exit.alpha = 0.50;

    this.timeline.addTween(createjs.Tween.get(this.bkg_exit).wait(1));

    this.visible = false;
  }
}
f8s[8].settings_menu = settings_menu;
Some of the options are mutually exclusive — 10 FPS or 30 FPS — and I need to ensure they cannot be toggled at the same time. To do this, I modify taskoneButtonsHandler.
I could have added a new handler for the settings menu buttons, but the buttons below the settings screen still work and need to be disabled while the settings menu is up.
This method was a bit spaghetti, and looking back, I could have used a global bool to track when you’re inside the settings menu and stop the main menu buttons from working accordingly. However, it works right now, so I’m not willing to mess with it.
Otherwise, the logic for keeping the buttons mutually exclusive is pretty simple. If one box is clicked, set its state toon and all other mutually exclusive buttons to their off state.
  device_toggle.set_state(true);
mobile_toggle.set_state(false);
desktop_toggle.set_state(false);
Now we have this:

{ sound: true, fps: 1, hover_dist: 0 };
sound is straightforward, as it can only be on or off, so it’s a boolean.
The fps and hover_dist settings are slightly weird, though; You would think it would be the actual framerate (10 or 30) or hovering distance, but I didn’t want to have someone modify the settings in a way that could make the game misbehave. I did, however, want to write supporting code to support more than two settings for both in the future, so I stored indexes instead of storing the game framerate.
  const framerates = [10, 30];
/// Framerate as an index into `framerates`
var framerate = 1;

// `framerate` is set in both the framerate clauses in the button handler function and in the initial settings decoder

mainLoopInterval = setInterval(game_class.instance.mainLoop, 1000 / framerates[framerate]);
To modify Adee’s hover distance, I add hover_distance to the y-axis offset inside the player movement code:
  const hover_distances = [is_mobile() ? -58 : 0, -58, 0];
// Hover distance as an index into 'hover_distances'
var hover_distance = 0;

// `hover_distance` is set in both the hover distance clauses in the button handler function and in the initial settings decoder

game_class.instance.chief.m.y += hover_distance;
As for the sound setting, I set gvolume, the global volume variable, to 1 if the sound is on and 0 if it’s off.
It’s great that the settings system works now, but when I reload the page, the settings are reset to the defaults that I initially set them to. To solve this, I need to store data locally.
I didn’t want to use cookies as the reading and writing interfaces seem like they suck to deal with.
So, instead, I decided to go with localStorage.
LocalStorage allows you to get and set items using a string identifier:
  // get
const cat = localStorage.getItem("myCat");

// set
localStorage.setItem("myCat", "Tom");
Using this, I could dump a JSON stringified object into it when I need to save the settings, then parse it back into an object when I initially load the settings.
Here, I’m getting thelocalStorage item with the id np_icecream_machine_settings, checking if it exists, using it if it does, and if not, using the default.
  var user_settings;
var test_local_storage = localStorage.getItem("np_icecream_machine_settings");
if (test_local_storage) {
    user_settings = JSON.parse(test_local_storage);
} else {
    user_settings = { sound: true, fps: 1, hover_dist: 0 };
}
After all that bug fixing and all those improvements, we get:
I’m relatively happy with the results of my bug fixes and improvements, but there are definitely more improvements to be made.
The game still isn’t super responsive, though. I did come up with a decent solution to this in the addendum section.
But this all leaves one question…
You can’t.
I’m not releasing the source code for a number of reasons.
While I have removed the function that sends your score to the Neopets servers, it’s not particularly difficult to rearm it by adding that function back in, and I don’t feel like giving players a potential advantage over other players.
I would also be redistributing source code that is not mine, which is almost certainly against the Neopets EULA and could probably get me into some legal trouble.
This whole experience was surprisingly fun. It taught me what not to do when obfuscating code, like attempting to hide the code instead of modifying the control flow of the code itself — although I understand this method would be absurdly complex due to the number of ways Javascript can be written but function identically — and it also gives me a few project ideas, like a program that automatically deobfuscates this entire obfuscation format.
I hope this information is useful for anyone, especially Neopets developers, as it would drastically improve the user experience. I understand that World of Neopia, Inc. is currently working on its simulation game World of Neopets, but I would love to see more love being put into the main site.
If a member of The Neopets Team sees this, please do get in contact with me. I would love to work on fixing these html ports. I understand that the Ruffle Flash player exists. However, since the HTML5 versions of the games are pushed more than the originals, they should ideally function better than the originals running on a compatibility layer.
I found out that it was way easier to use requestAnimationFrame in my deobfuscated codebase with createjs.Ticker. By setting Ticker.timingMode to RAF_SYNCED and then hooking game_class.instance.mainLoop into createjs.Ticker’s tick event, the game is now in sync with your browser’s refresh rate, meaning the game is being updated just before the browser draws everything to your screen, which considerably improves the responsiveness of the game. This also fits well with the FPS selection in the settings menu, but I would need to update it to add a sync option.
This has the issue of the framerate changing depending on the capabilities of your device, but I’m gonna trust that the developers of createjs were aware of this and handled it properly. As well, adee’s animation runs faster when changing the Ticker framerate from 24 to the default refresh rate of your browser, this is an easy fix though, just set the framerate property of the adee MovieClip child class to 24.
The result of this is:
It’s really smooth, but I can still feel some delay that could be removed.
Also, while playing my improved version, I noticed that, on higher levels, the ice cream scoops spawn at a faster rate when on higher framerates, making it practically impossible to beat without pure luck. This could be solved by further deobfuscation and restructuring of the game code by bodging in some delta timing, but I’ll leave that for another day.